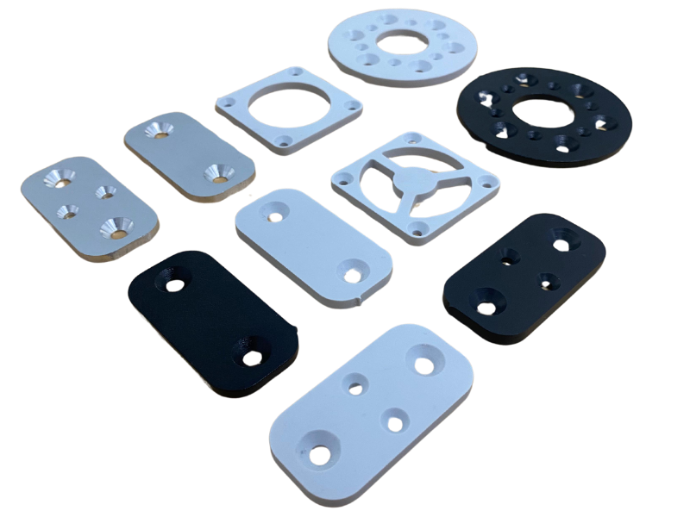
Countersinking is an important process used to align or conceal screw heads to the surface.
This is accomplished by tapered enlargement of the top of the hole where the head of the screw will sit.
It provides both aesthetic and functional advantages especially on flat surfaces.
Aesthetic Appearance
Aligning the screws with the surface provides a cleaner, neater and more professional look.
Ease of Assembly,
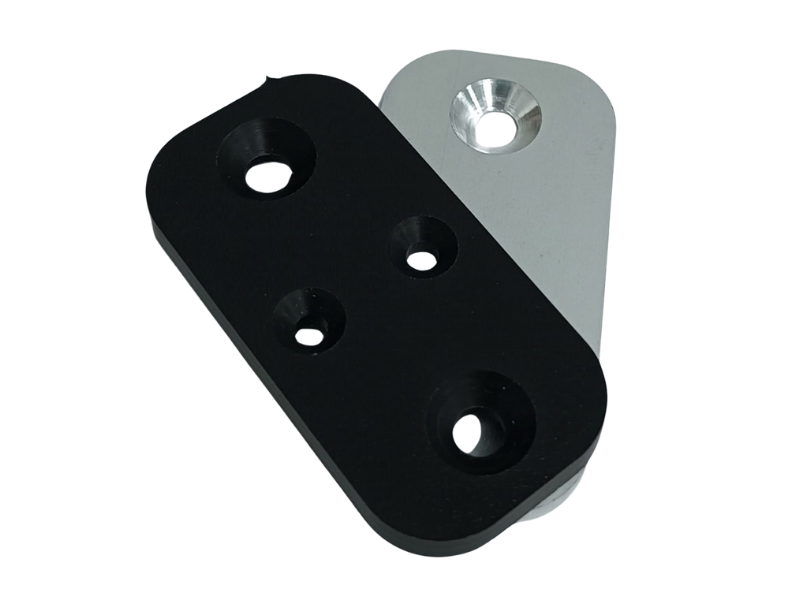
Thanks to the countersinking process, the screw heads do not protrude beyond the surface. This makes the assembly process more practical and ensures that the attachments fit properly to the surface.
Load Distribution,
The contact of the screw head with a larger surface ensures that the load is evenly distributed. This makes the connection points more durable.
+/- 0.40 mm accuracy
+1-2 days production time
Countersinking Guides
A few important points to consider when designing and manufacturing countersinks:
Countersink Cost
Countersinking is priced per hole.
Material Thickness
The standardized opening of the countersinks is highly dependent on the material thickness.
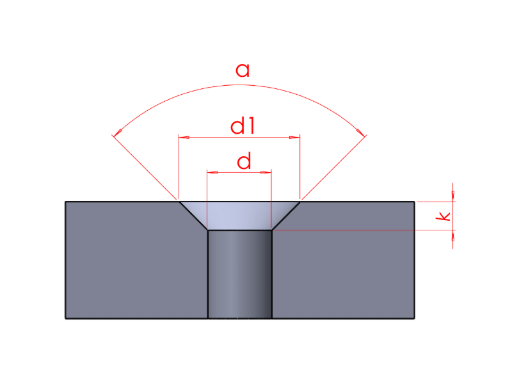
Metric Flat Head Screw | d1 | d | k | a (Angle) | Minimum Material Thickness |
M2 x 0.4 mm
| 4 mm | 2 mm | 1.2 mm | 90° | 1 mm |
M2.5 x 0.45 mm
| 5 mm | 2.5 mm | 1.5 mm | 90° | 1.2 mm-1.8 mm |
M3x0.5 mm
| 6 mm | 3 mm | 1.65 mm | 90° | 1.5 mm-2 mm |
M3.5x0.5 mm
| 6.5 mm | 3.5 mm | 1.9 mm | 90° | 1.8 mm-2.2 mm |
M4x0.7 mm
| 8 mm | 4 mm | 2.2 mm | 90° | 2 mm-2.2 mm |
M5x0.8 mm
| 10 mm | 5 mm | 2.5 mm | 90° | 2.5 mm-3 mm |
M6 x 1 mm
| 12 mm | 6 mm | 3 mm | 90° | 3 mm-4 mm |
M8 x 1.25 mm | 16 mm | 8 mm | 4 mm | 90° | 3.5mm-4.5mm |
Materials We Countersink
ABS |
Acrylic |
Aluminum |
How to Calculate Depth and Angle for Countersinking
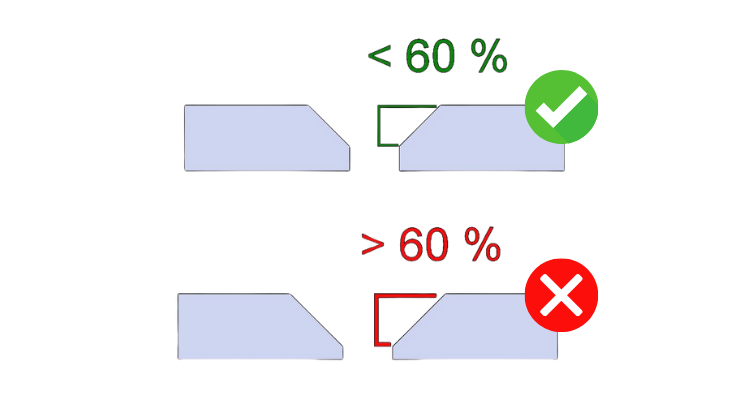
The countersink depth must not exceed 60% of the material thickness. Otherwise, the structural integrity of the part is at risk.
Depth is defined here as the distance from the surface of the material, or top of the slot, to the bottom of the slot.
If your countersink needs to exceed this depth, make sure the holes are far enough apart to avoid excessive stress.
Hole Size
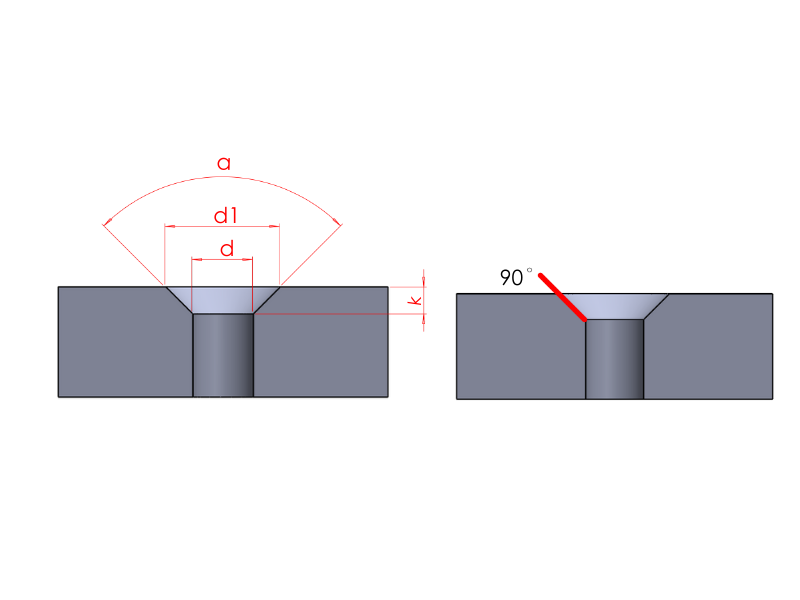
The large hole diameter (d1) should be equal to or slightly larger than the diameter of the screw head. Designing with reference to the exact diameter of the screw head is the best approach.
In the table below you can see examples of countersink sizing. Note that these dimensions may vary slightly depending on the screw manufacturer.
Standard Countersink Sizes
In the table below you can see the countersink sizes for standard screws. It is also possible to countersink outside these dimensions.
Metric Flat Head Screw | d1 | d | k | a (Angle) |
M2 x 0.4 mm
| 4 mm | 2 mm | 1.2 mm | 90° |
M2.5 x 0.45 mm
| 5 mm | 2.5 mm | 1.5 mm | 90° |
M3x0.5 mm
| 6 mm | 3 mm | 1.65 mm | 90° |
M3.5x0.5 mm
| 6.5 mm | 3.5 mm | 1.9 mm | 90° |
M4x0.7 mm
| 8 mm | 4 mm | 2.2 mm | 90° |
M5x0.8 mm
| 10 mm | 5 mm | 2.5 mm | 90° |
M6 x 1 mm
| 12 mm | 6 mm | 3 mm | 90° |
M8 x 1.25 mm | 16 mm | 8 mm | 4 mm | 90° |
What to Expect from Finished Parts?
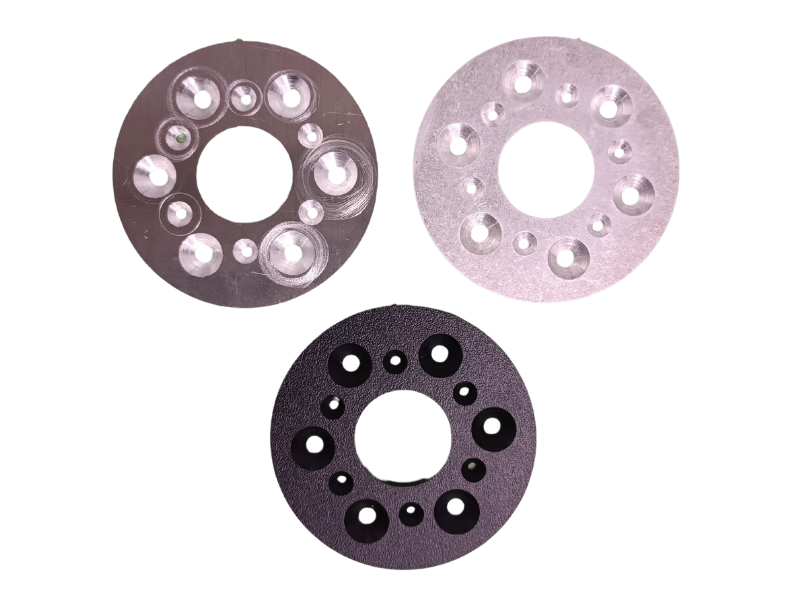
- Surface Quality: Machined surfaces may have minor scratches or oil residue.
- Sharp Edges: Deburring may be required after countersinking.
- Paint Tolerance: If paint is to be applied, hole sizes can be adjusted taking into account the paint thickness. Powder coating can add 0.15 mm-0.50 mm to the thickness.
Pre-Shipment Checklist
Be sure to follow the steps below so that your order can be processed completely:
- Drawing Format:
- 2D: .dxf or .dwg
- 3D: .step or .stp
- Scale: 1:1 scale and millimeter units should be used.
- File Control:
- All shapes must have closed contours.
- Stray points, duplicate lines and empty objects should be removed.
- Text should be converted into outlines or paths.
- Corner Radius: A minimum radius of 1 mm must be left on the corners to be cut with CNC.


